
I'm Jimmy and this is my blog!


|
If you are wondering how to install a dehumidifier, you are not alone. Crawl spaces are notorious for having high humidity and moisture levels. The fact is that your home's crawl space can be a breeding ground for a variety of problems, including Termites, Wood rot, and mildew. Fortunately, there are several easy ways to control the moisture and humidity in your crawl space 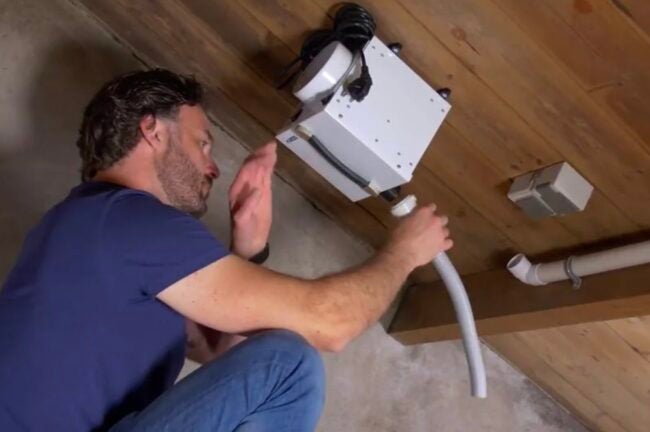 TermitesIf you notice signs of moisture in your crawl space, it's probably time to hire a professional pest control service. Termites love moist, dark environments, and they can be highly destructive to your house. Termites often target wood trim in a home's crawl space and will eventually destroy it. They will also leave behind frass, mud tubes, and abandoned wings. High humidity creates a breeding ground for dust mites and mold, which can seriously damage your home. By controlling the moisture level in the crawl space, you can eliminate these problems and improve the indoor air quality. Controlling humidity levels will also prevent ant and termite infestation, which can lead to even greater losses than fire and storm combined. And it's important to remember that a dehumidifier is an excellent long-term investment for your home. While a dehumidifier can significantly reduce the amount of humidity in your crawl space, it's unlikely to completely eliminate the problem. In fact, your crawl space should stay at or below 50 percent humidity. That's where the dehumidifier comes in. The Santa-Fe dehumidifier can help maintain this ideal moisture level and discourage wood-destroying insects. A humid crawl space is an inviting place for carpenter ants and other pests. Large ants will often make a home uninhabitable, and mold and fungus thrive in the warm, moist air. By keeping the air dry, crawl spaces will not only be more comfortable, but they will also help you save money on energy bills. It's worth considering the extra cost if you suspect a crawl space infestation. A contaminated crawlspace will attract pests. These pests can ruin insulation and wiring, and even damage timber substructures. As a result, the first step in pest control is controlling moisture levels. Excessive moisture encourages the growth of wood-eating organisms. Furthermore, high levels of humidity can cause structural damage to your home. So, it's best to hire a professional service to prevent infestations from affecting your home. Besides eliminating termites, crawlspace moisture level also affects the temperature of the interior of your house. A dehumidifier helps control moisture levels and makes your home more energy-efficient. In addition to that, it also prevents pipes from bursting. Moreover, high moisture levels in the crawlspace are conducive to the growth of termite colonies, which are climate-sensitive. Furthermore, high moisture levels increase the likelihood of mold growth and reduce the quality of your home's air. To solve the problem of excess water in a crawl space, you must first determine the source of the excess water. This could be ground water seepage, a plugged downspout, or a leaking plumbing pipe. If you know how to remove excess moisture, a professional company like Hero Mold Company will remove the water for you and provide a budget-friendly price for the service. Wood rotWood rot is a threatening problem for your home's foundation, especially in humid climates. It's also an opportunity to see if your gutters are clogged, or if your roof is leaky. Even if water isn't a problem in your attic, it can still damage your personal belongings. And if the water is coming from the roof, it will likely be deposited into your crawl space, which could lead to wood rot. There are various kinds of fungi, including wood rot fungus, which feed on wood and cause rotting. This type of fungi can also be harmful to your health because it releases mycotoxin - a toxic gas that mold produces. Some types of these fungi are dangerous to humans, so if you suspect that your crawl space is suffering from wood rot, it's crucial to install a dehumidifier in the space. A dehumidifier is an effective way to prevent wood rot and prevent mold in your crawl space. Mold, mildew, and bacteria can grow in these spaces, resulting in a dangerous environment for your home's structural members. You can install a dehumidifier in your crawl space to prevent wood rot by keeping the space dry. You can buy a digital thermo-hygrometer for $15, which will tell you if your crawl space is too humid. If the humidity level is higher than 80%, it's time to get a dehumidifier installed. This will prevent wood rot in a few weeks. You may even notice improvements in your home within a month. During the winter, you'll want to close the vents to prevent the moisture from accumulating in your crawl space. Open vents have been a common building practice for decades, but they do little to prevent mold or mildew from growing. The warm, moist air from the outside mixes with the cooler air in your crawl space, causing the relative humidity to rise. And this moist air rises through your home and ends up in your living room. When you are ready to install a dehumidifier, call a professional to help you decide which type is right for your home. Choosing a crawl space dehumidifier that's right for your home's crawl space is essential, so it's worth hiring an expert to make sure your home's moisture level is under control. A dehumidifier can also help you save money on energy bills. A dehumidifier is a great tool to keep in your home's crawl space, a place that tends to be uncomfortable during the summer. It can also make it difficult to breathe, which can result in health problems and even the attraction of pests. But a dehumidifier will remove all these problems, and keep your home's humidity level healthy all year round. MildewIf you're wondering how to install a dehumidifier to prevent the growth of mold and mildew in your crawl space, you're not alone. Many homeowners don't even realize that they have a moisture problem until it's too late. Often, they don't discover the problem until a musty smell appears or one of their loved ones has a respiratory illness. Thankfully, there's a simple solution to this problem.
The first step in drying out your crawl space is to clear the top area of debris and standing water. Then, you can install a dehumidifier or sump pump to prevent moisture from re-entering the space. Putting in a dehumidifier in this area is one of the simplest solutions. This inexpensive home improvement project will dry out the space and prevent the growth of mildew and mold in the area. While many homeowners are concerned about the cost, it is worth the expense if it prevents structural damage. The excess moisture in a crawl space can also cause a musty odor that can be easily transmitted throughout the home. The dehumidifier will eliminate the musty smell and keep your crawl space a safe place for your family to live. If you're concerned that a mold or mildew problem could occur, the dehumidifier is the perfect solution. When you're thinking about installing a dehumidifier in your crawl space, remember to match the unit you choose to your crawl space's condition. This way, you won't end up with an ineffective device. You should consider a professional for the job, as hiring a handyman or contractor may not be as cost-effective. Another reason to use a dehumidifier in southeastern Florida is to reduce the humidity level of the space. Because a crawl space contains a lot of moisture, it is susceptible to mold and mildew. Hence, if your crawl space has open vents, the moisture would travel upwards via the Stack Effect (also known as the chimney effect). However, if the air in the crawl space is not humid enough, the "Stack Effect" can result, where warm air in the crawl space will pull moisture into the home and cause a suffocation in the lower parts of the house. A dehumidifier will also help control the negative pressure in your crawl space. The dryer air will reduce the chance of mildew and mould formation. Additionally, a dehumidifier can remove odours from the space and improve the air quality in your home. This is a great investment for anyone who wants to protect their home against mould and mildew. The first step is identifying the source of moisture in your crawl space. If you don't find the source of moisture, it will spread and grow to epic proportions and cause irreversible damages. Once you know where it's coming from, it's time to fix it. And you're ready to take advantage of this new technology. Keep reading to learn more about this essential device and how to install a dehumidifier in a crawl space. If you have wood furniture, you may wonder how to protect it from termites, or how to clean wood furniture at home. These methods include soap and water, lemon juice, and mineral spirits. You may also try wax. Wood polish and wax are similar but different, although furniture wax will protect your wood better than either. However, wood polish will damage the finish of your wood furniture, while furniture wax will preserve the color of your furniture. Protecting wood furniture from termites In addition to using a specialized exterminator, you can protect your wooden furniture with a homemade treatment of olive oil and white vinegar. The combination of these two substances acts as a barrier against termites and repels them from your furniture. You can also use the treatment on wooden items that are already infested. Aside from killing termites, olive oil and vinegar can also beat moisture in the wood. You can also protect your wood furniture with aloe vera. You can apply the gel to the wooden items, which will act as a barrier against termites. A mixture of olive oil and white vinegar is another effective remedy. The mixture repels termites. For further protection, use a specialized wood polish or have your carpenter apply it for you. By following these simple termite prevention techniques, you can protect your wood furniture. Cleaning wood furniture with mineral spiritsYou can clean wood furniture with mineral spirits at home for a fresh, new look. The mineral spirit, which is petroleum-based, works wonders on wood furniture. Before you use mineral spirits on your wood furniture, test a small area on a cloth with some mineral spirit. Use the dampened cloth to rub the furniture with mineral spirits, and then wipe it with a dry cloth. Check to see whether mineral spirits is damaging the varnish. You can also use a rag dampened with mineral spirit to remove dust and other residue from the surface of the wood. Apply the mineral spirit along the grain of the wood, but avoid rubbing it into the surface. A clean cloth, such as a microfibre or non-scratching cloth, is ideal for this task. Mineral spirits will collect dust, so use a new one after each application. Cleaning wood furniture with soap and waterYou may be wondering if cleaning wood furniture at home is safe, especially if you aren't sure what kind of chemicals to use. The answer is yes! You can use dish soap, diluted in water, to clean wood furniture. However, this household cleaner might not be as safe for wooden furniture since it can damage the finish. Before applying the soap to your wood furniture, test the mixture by wiping a small spot of the furniture with a cotton ball. If you want to use soap on your wood furniture, you can purchase some oil-based products. There are many brands of these products, and most of them contain a chemical-based agent. When using soap on wooden furniture, don't use it for long periods of time. Instead, use small amounts in small sections and rinse thoroughly with clean water. After cleaning, pat dry with a soft cloth. Do not use all-purpose cleaning sprays on wood furniture, as they may contain toxic chemicals. 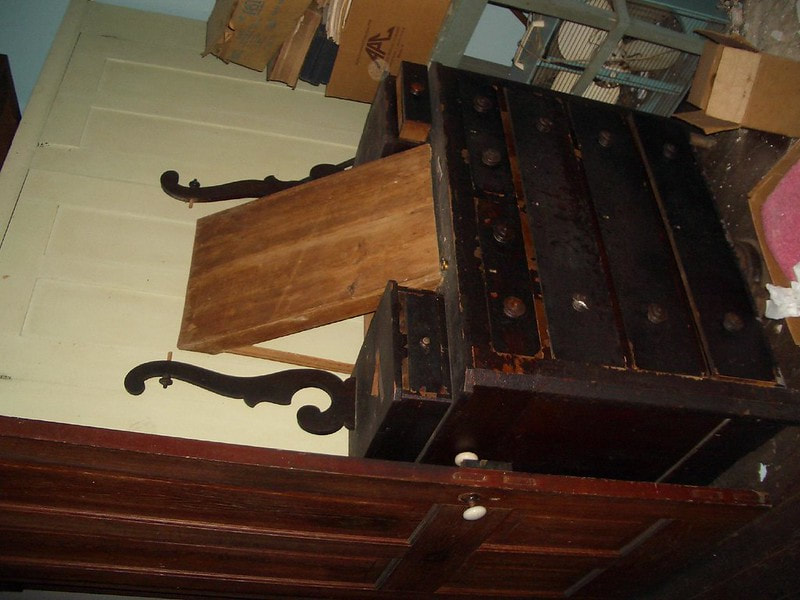 Cleaning wood furniture with lemon juiceLemon juice is great for cleaning wood furniture. It can remove stains and smells. It can also be used to clean fabrics such as cotton and polyester. It is easy to apply, but you might want to try a small amount on the fabric before applying it on the wood. A mixture of one tablespoon of lemon juice and one cup of white vinegar can remove stubborn stains. For additional cleaning and polishing, you can use lemon oil on the surface. To apply lemon oil to your wood furniture, you need to rub it gently. It may take a few days to remove all of the liquid, so keep it in the refrigerator until you need it. If you use lemon oil to clean wooden furniture, it can help restore the oils in the wood. It also helps prevent the wood from cracking. Lemons are a great natural cleaning agent, as they will get rid of stains and grease, as well as rust. They smell fantastic too. The oil is available in two forms - lemon juice and lemon essential oil. The oil can be mixed with the lemon juice or olive oil and applied to the wood furniture. Cleaning wood furniture with coconut oilCoconut oil has many uses for cleaning and polishing wood furniture. Some natural cleaners also contain it, but coconut oil is a fantastic choice for cleaning wood furniture. Just mix about a tablespoon of melted coconut oil with one-third cup of lemon juice and apply it to the furniture's wooden frame. Dry it thoroughly with a soft cloth to keep the oil from drying out and becoming rancid. Then, buff with a soft cloth to restore the shine of the wood.
While coconut oil can't be used to seal furniture, it's an excellent wood conditioner and polish. It can also be used as a wood stain carrier. It won't make a durable finish, however, and won't dry to a polymeric topcoat. Coconut oil is also a great choice for polishing wood furniture that's been sitting for years. Coconut oil also has a wide range of other benefits, too.  If you're in the market for new heating and air conditioning appliances, here are a few factors you should consider: Energy efficiency, Size, Repairs, and Cost. Once you know these details, you can select the best heating and cooling system for your home.
If you're not sure what to look for, you can also use our HVAC appliance guide to find the best option for your budget. We'll walk you through each feature and answer your questions. Energy efficiency In order to cut energy bills and help the environment, new buildings are required to meet strict standards for energy efficiency. In order to achieve these goals, building envelopes are designed to last for many years. In contrast, appliances and building equipment need to be replaced every 15 years. This provides an excellent opportunity for manufacturers and consumers to make their buildings more energy efficient. These new regulations are bipartisan, and they aim to improve energy efficiency and reduce greenhouse gas emissions. The standards are expected to save a combined total of 128 quads of energy by 2030. In 2010, the U.S. consumed about 100 quads of energy per year. The Energy Policy and Conservation Act (EPCA) requires appliance manufacturers to meet certain standards for energy efficiency. In the United States, 15 states have energy efficiency standards for appliances and equipment. Building codes and utilities are other ways to achieve energy efficiency. Additionally, industry promotion and award programs are another way to help consumers save energy. ENERGY STAR is an award program administered by the Environmental Protection Agency and DOE. This program recognizes energy-efficient products that meet or exceed these standards. Size The size of your HVAC appliances is critical to maintaining the comfort of your home. An undersized system will have to work overtime to maintain the desired temperature of the room, and it will eventually wear out prematurely. An oversized unit will waste energy and money by wasting electricity and energy-related costs. To determine the size of your HVAC appliances, calculate your energy usage. You will need to determine how many tons of AC or heating you need and how many heating units you need. A properly sized HVAC system will save you money on energy costs and prevent high temperature swings, even in warm weather. If you are unsure of the size you need, ask an HVAC professional to help you calculate the BTU capacity of your system. It is often difficult to determine the exact amount of energy your current HVAC system will consume, and you may end up with an undersized unit. HVAC contractors use a process called load calculation to determine the correct size for your home. A properly sized system will use less energy and run more efficiently. Repairs Home warranty plans are one way to get coverage for repairs on your HVAC appliances. These plans typically cover repairs for 1 year, with an annual premium. Some home warranties cover routine maintenance as well. Schedule routine maintenance so that you can catch small issues before they get out of control. If something does go wrong, you can file a claim online. If your appliance is not covered by your warranty, you should research your options. Fortunately, most warranty plans cover repairs for both heating and cooling systems, as well as routine maintenance. While you wait for your repair, you can clean out the condenser using a brush attachment. Also, clean any obstructions that may have built up inside of it. In addition to cleaning, be sure to set the thermostat in heating or cooling mode, and check all electrical connections. Then, wait for the repair service to come out. If you can't wait for the repairman, you can also turn your AC on a continuous setting while you wait. Cost If you're a new homeowner and are wondering how to get the best deal on HVAC appliances, it's important to know the different costs associated with the different parts of the HVAC system. While you may not be able to avoid repairs altogether, there are a few common costs associated with HVAC appliances. Routine maintenance is a common expense, and HVAC companies typically offer this type of service at a reasonable price. A maintenance visit may only take an hour or two, and the technician will check the main components of your system. Depending on the type of service you choose, you should expect to pay anywhere from $75 to $200 for this service. Among the most common costs associated with HVAC appliances, installation is the most expensive part. An average residential system costs anywhere from $12,000 to $22,000, while new HVAC installation may cost as much as $12,000 or more. In addition, ductwork replacement can cost anywhere from $20 to 65 per square foot, and can easily add up to a few thousand dollars depending on the size of your house. Regardless of which appliance you choose, make sure you have the budget for the entire job. 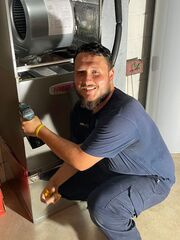 Before you begin a home renovation project, you should map out the timeline for the entire project. Make sure to leave some wiggle room for unexpected delays or changes. Create a realistic budget and timeline to keep the project on schedule. Be sure to prepare the room beforehand and avoid it during the construction process. If you need to hire a contractor, make sure you carefully discuss the costs and the overall complexity of the project. You'll be surprised by how expensive it can be to get your home ready for a renovation project!
Lessons learned from home renovation projects There are several lessons to be learned from home renovation projects. While a house is always better than a new one, there are also many pitfalls to avoid. Preparation is the key to success. If you don't take the time to plan your project before you start, it can cost you dearly and compromise the design you want. In addition, renovation preparation can maximize design opportunities. You can use an architect to create the perfect floor plan, which will be useful in determining the size of each room and its connections to the outdoors. Costs of home renovation projects Home renovation projects come with a wide range of costs, depending on the size and complexity of the work. Larger projects, for example, may require rewiring the entire house and a new bathroom suite. The cost of such work will be much higher than smaller projects, however. In general, you can expect to spend between 10 and 15 percent of your total renovation budget on these projects. To determine the exact costs of renovation, start by determining what your priorities are. After establishing your budget, you should decide on what your project will involve. The next step is to find a builder. If you're on a budget, you may want to consider relocating to a smaller property or removing items that aren't functional. Depending on the extent of your project, you may be able to do as little as painting a few bedrooms or completely gutting the house. Complexity of home renovation projects When preparing for a home renovation project, it's important to understand how complex these jobs can be. A complete home renovation can take months, or even years, to complete. The time spent on each step should be calculated, as well. Many factors contribute to the complexity of home renovation projects. In addition to the time it takes to plan and build the new space, it can take additional time to get the materials and appliances you need. While spring cleaning is a cultural tradition that evolved into an annual event, many homeowners tend to complete simple home renovation projects on their own. While cutting labor costs can be a tempting option, you should keep in mind that building materials and labor can increase four times a year. The earlier you start your project, the more likely the finished product will last. In addition, poor on-site work performance can affect the lifespan of fixtures and finishing products. Cost of hiring a contractor Depending on the project and contractor, the cost of hiring a contractor can vary widely. Some costs are clearly outlined, such as labor. Different types of labor are priced differently. Plumbing and wiring, for example, are typically expensive. Additionally, master electricians and plumbers have seen their costs increase in recent years due to higher safety standards and certifications. It is important to carefully estimate the total cost of hiring a contractor. The "labor" of a contractor is often made up of other costs, such as insurance and license fees. Typically, a contractor takes home about 10% of the total bill as profit. This means that, for a $2 million project, the contractor will net about $200k. Since contractors' overhead continues to rise year after year, this amount will never be passed on to the client. Although some contractors include a separate line item for profit, others build it into other budget lines. |
Connect with us!
|
 RSS Feed
